Showing posts with label Renovation. Show all posts

Monday, May 13, 2013

Open shelving #kitchenrenovation

Hello?  Hello?  Anyone still reading this?  Long time no see!  We have been keeping busy with projects but some are taking longer than expected and quite honestly nothing worthy to blog about.  One of the projects in question that took a lot longer than we anticipated was the building of the open shelves in the kitchen. 

We knew we wanted to use wooden corbels and I really wanted antique ones but finding 12 matching ones in the dimensions we need proved to be a lot tougher (and costly!) than I thought.  We decided to check out the Unfinished Mill Store in Canton and wouldn't ya know they had corbels for $2.50 each!  I couldn't contain my excitement...corbels are at a cheap price and that I could paint??  I was sprinting to the register!

But of course we had to modify them due to the shelving's depth.  Our dinner plates are 11" deep so our shelves needed to be 12" deep.  But our corbels were only 6" deep.  Not gunna cut it.  The support brackets should be at least 2/3 the deep of the shelving unit.  So Jim came up with a brilliant but still attractive solution.  He took two pieces of wood that he ripped with his table saw (I even got to rip some boards!)  and then mitered the top board to make it look fancy.  I love the results!  Isn't Jim getting so handy??? 

Enough chit chat...below are the open shelves on either side of the window.  Ahhh I love them!  They totally complete the farmhouse chic look I was going for in the kitchen.


A view of the right side shelves.  Sooooo glad we decided on white dishes when we registered for our wedding 4.5 years ago (btw how has it been 4.5 years???).  I love the impact they have all grouped together and I love how we've added pieces through the years...all from different places but yet they all go together.


Close ups!  I tried to add some chotchkies on every shelf.  You know me and my chotchkies...A succulent in a green vase for a pop of color behind a milk bottle that Babci gave to Jim.

I saved the top shelves for lots of chotchkies (while still be practical).  Each piece has a story of how we got them...many were gifts, some we had before we were married and some I've bought from yard sales, thrift stores and antique stores.  The back gravy boat was off our wedding registry, front gravy boat is an iron stone piece I bought at the antique store that I love in NH, the covered casserole dish was a house warming gift (thanks Alison and Bob!), the white ceramic bread basket was a Christmas  gift from Mama Staunton and the stacked popcorn bowls were Jim's before we were married. 


A lil pop of color on the middle shelf with that orangey/coral canister (thanks Target clearance!).  Thinking of putting a tiny succulent in it for even more color.  Here is where our drinking and juice glasses along with our round bowls, corn on the cob dishes and serving dishes are stored.


Side view of the the left side shelves.  This is also a good picture of the corbels.  You can see where Jim mitered the top board.  I think they look like we bought them that way.


Another succulent (can you tell I love succulents!?  Also thanks Krissy!)  They're just sooooo easy to care for.  I hope they do Ok on the shelves since they won't be in direct sunlight. Behind it is another glass milk bottle from the dairy farm down the road from us. And our dinner plates and luncheon plates are stored here as well.


On the shelve above is our appetizer plates and our rectangle dinner dishes along with a blue gurgling cod that Mama Staunton got for Jim for Christmas.

And above are two more pieces of ironstone...the cake stand and the pitcher.  The cake stand I scored from Goodwill for $1!!!!  And the pitcher I scored from a yard sale for $2!!!!!!!!  Can you believe the deals I got on those???  Along with a mini strainer that Mama Horne gave us because she knows my love for all things mini (isn't it so cute?!), a french butter keeper (another Christmas gift from Mama Staunton) and a cloche I scored from Goodwill for $1.


We made the right side shelviing stop before the end of the peninsula so as not to hit anyone in the head when they sit down.


And since I'm a shortie I have to use this beauty to get things off the shelves.  Mama Staunton did give us her great uncle's step stool that I plan on painting a fun color to replace this.  But until then this works just fine!


Lots more projects in the works.  I'll be back with some yard work that's been going down.


Thursday, April 18, 2013

Finally! New doors and hardware #pantryrenovation

The new doors are in!  The new doors are in!  AND the knobs are installed!  Ok ok so the doors look slightly horrid right now especially since food is just thrown in there haphazardly and there's nothing in the middle of the doors but just wait till they have chicken wire in the middle....oooooh ooooh these suckers are going to go from ugly things to shining bright like a diamond cabinets.  Stick with us to see the project through and you'll be able to see my vision.


Close up of the knobs...all antiquey brass and white shiny ceramic knobs.  I love them and I think they compliment the pulls.


Small things happening but as I type this Jim is working away on the pantry.  Whata guy! 

AND I get to partially cross something off the list!  Ahhhh God I love crossing things off...even if it is just partially:

  • Paint radiator cover same color as cabinets
  • Paint shelves and shelving trim same color as cabinets
  • Select a wall color
  • Paint the walls
  • Install pendant light
  • Install crown moulding
  • Paint the trim
  • Paint the pocket door
  • Install the beverage center
  • Get the new cabinet doors (as they sent us the wrong ones originally) and install the chicken wire
  • Organize and pretty up the cabinets and shelves
  • Make a window treatment
  • Fix window trim
  • Wednesday, April 17, 2013

    Finishing touches #kitchenrenovation

    Our general contractor came back from his vacation and finished up a few things.  One of them being the dishwasher panel.  We got the incorrect sized panel in the original cabinet order and it takes about a three week wait to get the corrected cabinet so needless to say we had one naked dishwasher....poor thing!  But it's naked no more thanks to a fancy new panel and pull.  I love how it blends seamlessly with the other cabinets.  And of course I love the chance to use the pull again.


    The cabinet baseboards were installed.  Just that little detail makes the cabinets look more complete.


    And I duck taped where our open shelves will go on either side of the window.  They'll be about 12" deep with wooden corbels holding them up.  The top shelf is higher up but this is where I'll put less used items like serving platters and pitchers.  Looking to the right of the window.
     
     
    To the left of the window.

     
    And a full on shot.  And yes those are dishes and glasses on our counters.  They're there for now until we get those bad boys installed. 


    Still lots of to do's that is now on our shoulders.  Here's a project breakdown to keep us accountable:

    • Make open shelves
    • Paint open shelves
    • Hang open shelves
    • Paint crown moulding
    • Paint back of peninsula
    • Hang roman shade
    • Finish under the upper cabinet of the coffee station
    • Paint trim
    • Second coat of paint on chimney
    • Touch up wall
    Till the next time!

    Monday, April 8, 2013

    Counter tops and Shelving #pantryrenovation

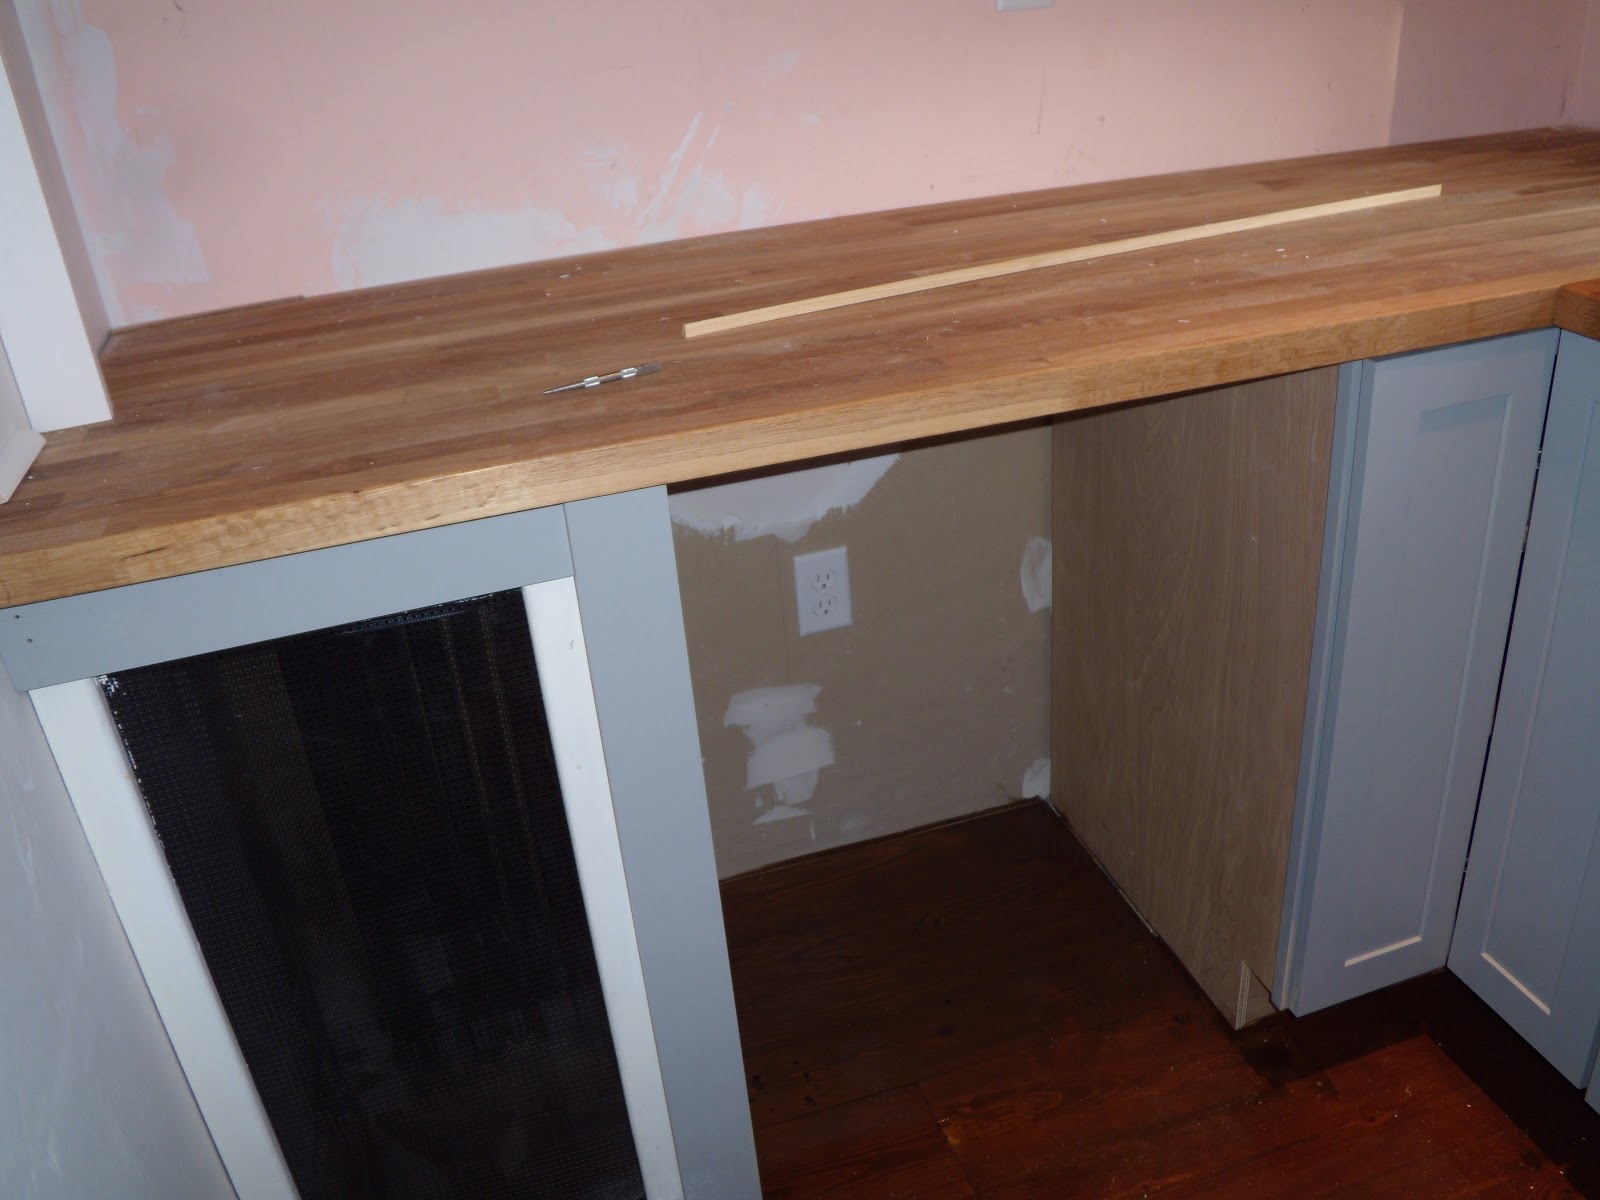
    Well while I was out flitting around shopping with my mom, sister and niece and nephews this past weekend, my man was hard at work.  He got the counter tops installed and put up the shelves and trim to create the built in hutch look I was yearning for in there.  It looks awesome!  He did such a good job considering he's never installed counter tops before!  Way to go Jim!

    It was VERY hard getting good pictures in here with my little point and shot.  I wouldn't mind a nice new fancy camera with a wide angle lens if I'm going to be a legitimate blogger....some day...in my dreams....just putting it out there.....Anyhoo, below is a terrible picture of the amazeballs shelving Jim installed.  You may remember we had open shelves in this same exact spot but these are deeper, trim added to make it look like a built in hutch and all around better.


    Looking head on at the shelves.  I really tried to get a good shot with the cabinets and counter tops all in one shot #fail.  The shelves and trim will be painted the same color as the cabinets below and what is salmon colored walls will soon be a nice tan color (we think anyways...no color has been officially selected yet).


    Jim finished the top of the shelves with a solid board on top giving this area a more finished, furniture look to it.  There will be crown moulding at the top.  And excuse the ugly light.  We are waiting on the electrician to come back to install our pendant light we just received.


    Ahhhh butcher block counter tops how I love thee!  It looks so great with the cabinet color.  Such an affordable counter top option.  And we have enough left over to make a couple cutting boards.


    I probably should have moved the junk on the counter tops.  Apparently I was being lazy yesterday afternoon.


    And of course I have to give a close up beauty shot.  We finally ordered the beverage center so that should be getting installed shortly.  The counter tops come with one coat of conditioner so we will need to condition it once we are done working in here.  It's as easy as buying mineral oil from the drugstore and giving it a good rub down.


    And a shot looking in from the kitchen.  It looks so good!!!  DAH!  It's only the beginning on the pantry renovation but with the little we have done, I'm already in love with it.


    And yes our infamous paint swatch wall is back.  Anyone have any favorites in the crowd?  We narrowed it down to a tan/latte color for the walls.  We think it will bring out the cabinet color and the butcher block counter tops yet not compete with the burlap pendant.


    We have lots to do yet on this pantry makeover.  Here's the project breakdown:
    • Paint radiator cover same color as cabinets
    • Paint shelves and shelving trim same color as cabinets
    • Select a wall color
    • Paint the walls
    • Install pendant light
    • Install crown moulding
    • Paint the trim
    • Paint the pocket door
    • Install the beverage center
    • Get the new cabinet doors (as they sent us the wrong ones originally) and install the chicken wire
    • Organize and pretty up the cabinets and shelves
    • Make a window treatment
    • Fix window trim
    I think making a list of To Do's will keep us accountable and keep on track of what's been done and what hasn't.  Here's to hoping it works!

    Monday, April 1, 2013

    Random post...getting caught up.

    Long time, no see!!!  Sorry for the absence....Mama Staunton, Jim and I were working like dogs last week trying to get the house ready for Easter entertaining.   Man am I sore!  I'm not used to daily physical activity since my normal routine is being stuck behind a computer for 8+ hours a day.  But Easter went great and it feels good to be amongst the normal people again with a nice, clean house!  Well at least for a couple days as our house will get messy again this week due to the sanding and staining of the floors. 

    We have been taking our new appliances for a test run to make sure everything runs the way it should.  Or it could be just Jim's excuse to try out the tappen yaki grill.  Below Jim is practicing his onion flipping skills.  This only took about 10 tries to get the money shot but not bad.


    And the penny tile was installed and to say I'm in love is an understatement!!!!!!!!!  I just love the way it shines when the light catches it!!!!  LOVE LOVE LOVE LOVE LOVE!!!!  I think it goes with the granite and the wall color. 


    And the tiled back splash against the range wall.


    A close up from the side.


    Ahhhh I'm so happy with it!


    And the wall looking into Lady Land.  Just wait till we have the open shelves up.  Then the walls hopefully won't look so empty.


    And we stopped the tile right where the peninsula ends.  The tile guy did such a nice job.  I stare at it constantly. 

    And here are 4 out of the 6 kiddos for our annual Easter egg hunt right before we let them run wild.  Aren't they so cute???


    There goes Jake in his brand new teal jeans.


    Avery and Evan going crazy scooping up all the eggs they can get. 


    And there's AJ and Jake on the hunt.


    And afterwards!  Man did those kids clean up or what??? 


    Overall entertaining in the new kitchen was great!!!  There's so much more room to move around in and no more fighting for oven space.  It was awesome and looking around on Easter really made my heart swell with gratitude for all that we have. 

    Floors are getting stained this week so back to no kitchen for a full week.  More updates to come!
    

    Tuesday, March 26, 2013

    Day 21 #kitchenrenovation

    The final push!  The plumber came yesterday to hook up the appliances and last night we christened our kitchen by making our first meal in it (well not entirely true....on Sunday we used our convection oven to cook english muffin pizzas since that was hooked up and working).  Minor detail!  I sat at the peninsula sipping some wine while Jim cooked us dinner.  It was great!  I still look around at the kitchen and can't believe we actually pulled the trigger and got it done. 

    Our sink and disposal are hooked up and working so we can FINALLY say good bye to washing dishes in the upstairs bathroom.  That really was the worst part of the whole living through a kitchen renovation.  So it's SO nice to have a working faucet, sink and disposal back!  And isn't that faucet a piece of art?!?!  I am so so so happy with it.  It's not nearly as tall as we feared it would be and gives the countriness of the farmhouse sink a slight edge with the industrial looking faucet.  And it's fun using the hand sprayer and the pot filler.  Never a bad thing to have options.  And the farmhouse sink?!?!  It's A-M-A-Z-I-N-G.  It's so big I think I could give Jim a sponge bath in it!  It's seriously great.


     I couldn't for the life of me get a good picture of the refrigerator with it's blinged out grill finally installed.  Poor lighting last night.  But at least you can get an idea of what it looks like since all the previous pictures had that silly gap above it.   


    And the rest of the bead board beneath the pass through was installed.  Sadly, there are no room for corbels underneath :(  I guess I'll learn to manage without them....some how.


    I think the bead board in both "windows" ties them nicely together and makes them look like they were always like that.


     And because we're cheap skates we decided to paint ourselves.  We painted the old kitchen ourselves which wasn't that bad but this new gal???  What a beast!  I'm the resident cutter inner and Jim's the roller.  Well there is A LOT of trim in the new kitchen!  Bad for me, great for Jim!  But Jim was a gentlemen and helped a girl out...whata guy!!!

    But we are done!  And we're so happy with our choice of color...Wedgewood Grey by Benjamin Moore.  It has hints of blue, grey and green depending on what light you look at it in.  Gives this neutral kitchen some life.


    We painted the trim the same colors as the walls and I'm so glad we went with this idea because I think the trim blends in with wall as opposed to popping out and becoming the main attraction which is what I did not want.


    It makes the grey in the cabinets really pronounced now.  You may be thinking man are they lazy or what?!  They didn't even paint all the way to the counter tops!  We're not that lazy!  The back splash tile will cover this so we didn't want to waste time or paint by painting all the way down to the counter tops.


    Painting near the chimney was a beast of a job but I don't think we did half bad if I do say so myself!


    And the pendants still pop against the color.


    You will notice we didn't paint up towards the ceiling in the old hallway.  We plan on adding the same crown moulding that Mike put up in the kitchen in this area.  We still have the trim and the bead board to paint but we're taking our time on it and painting when we have free time. Oh and that black paint on the door is actually magnetic paint.  Since our fridge can't hold magnets due to it being stainless steel whats a girl to do when she wants to hang something up?  Well I had read up on this magnetic paint and wanted to try it out, so this was the perfect opportunity.  It's just a primer so we plan on painting over it with white latex paint (as long as you put latex paint over it, you can use any color).  I'll let you know if it really works.


    And finally the extenders for the laundry nook faucet were changed from brass to shiny chrome. Ahhhh much better!


    And here are my men working it in the new kitchen.  Aren't they so cute??? 


    Our first meal made from the new kitchen....pork milanese with a side of roasted asparagus and pan fried potatoes.  Oh yum!  Not too bad for a 10:30 PM dinner.


    I think we're gunna love this new kitchen of ours.  Back splash tile gets installed today!  DAHHH!  The anticipation of it all!