Thursday, March 21, 2013

Day 19 #kitchenrenovation

Turn out the lights baaaaybaaaay (name that tune!)  Actually don't turn out the lights!  Turn them ON!  Man oh man am I in love!  Some of you have asked me if there has been a moment yet during this whole process if I was afraid that our vision wasn't turning out like we thought it would.  This was that moment...I was afraid the pendants were going to be too big for the space but thankfully I think they turned out to be the perfect size.  They did look ginormous in the box (even Jim thought so) but now that they are installed they look normal.  Guess I need to work on my spatial relations.

Below are the teal farmhouse pendants that are hanging over the peninsula.  I think they add a nice pop of color in our neutral kitchen.  My thinking behind this whole kitchen was to keep the really expensive stuff and the main parts of the kitchen neutral in hopes that it will stay in style for many years to come but yet add in color in areas that are cheaper and easier to replace should we get sick of them. Cue the teal colored lights.


And below is the pendant hanging over the sink.  Again another one where I thought it might be too big when it first arrived but now that it's up I love it and the size is just right.  Sorry for the hard to see pictures.  I didn't take these till really late last night.  And I know I need to work on my photography skills and maybe even learn how to use photo shop.


Close up of the farmhouse pendants.  Aren't they fun?


Looking towards the powder room.  This shot gives you a perspective for about how high up they hang.  It's a good distance from the counter to the bottom of the lights.  You can still stand up and not have these hit you in the face.


A somewhat better shot on the sink pendant.  You may have noticed the light bulb if you're keen observer.  If you did, you get a gold star for the day!  We purchased what they call vintage light bulbs.  They are a unique shape and clear so you can see the filament.  I think they give the pendants that extra oomph!  You can find them in the light bulb aisle of any home depot or hardware store.  They do cost extra just to warn you (Jim may or may not have a small heart attack when he saw the price.  So if you go with your significant other to buy these, make them wear a blindfold, supply them food so they are distracted or have them go to another department.  You'll thank me later.)


Beauty shot!


The electricians also installed the convection oven.  Yes the door is missing, your eyes aren't fooling you.  Mike has to come back to put the door back on.


Now the refrigerator has its friend the convection oven to talk to.  They're so cute together aren't they?  Our refrigerator is up and running now as well.  (water dispenser and ice maker to be hooked up on Monday when the plumber comes back out).  And the vent hood for the range was also hooked up. And no we haven't picked a color yet.  We need to get on that.  Bad Hornes!


Our new pantry light.  Isn't she priceless???  Don't you just love her???  Just kidding!  That's not our real pantry light...it's just a temporary holder until the real light fixture comes in.  It's been back ordered for FOUR months.  Yes I typed that right and you read that right.  Count 'em FOUR months!  Ridic!  Back ordering has been the name of the game since the kitchen renovation started.  Guess the economy can't be that bad right?


And the laundry nook chandie...isn't it sooooo gorg????!?!  I love the shadows it cast on the walls.  Just makes doing laundry that much more fun.


Side shot for you because I can't get enough.


Tomorrow the granite is getting installed.  I think that is going to be a complete game changer and really take the kitchen to another level.  Can't wait!


Wednesday, March 20, 2013

Day 18 #kitchenrenovation

Back again to report on more trim working and finishing touches.  The end is in sight and each day the kitchen gets a lil closer to being functional.   

Below is a close up beauty shot of the kitchen cabinet drawer pulls.  I think they tie in well with the knobs and the apothecary pulls.  These look like they should have a label on them but sadly they don't.  Although I suppose I could craft something up.  Hmmm...me likey this idea.  #labelobsessed


The hood is installed!  Kinda makes the range look more legit with the big hood on top of it. 


And finally the crown moulding on top of the cabinets got installed!  Ahhhh the upper cabinets now look complete.  LOVE how there's zero space up on top of the cabinets and the moulding gives the appearance of the cabinets being built in.  Just that lil finishing touch that makes a huge impact.  We have to paint the moulding the color of the cabinets so it will make much more sense and look a thousand times better once that's done.  I promise!


More shots of the crown moulding.  Heartsies!


Below are the apothecary drawers.  Aren't they just so cute????  These suckers can indeed have labels put on them and I can't wait to get started on labeling them.  How cute are they going to be?!  Like a library card catalog but kitchen edition.  They will sit on the granite counter top and then a piece of granite will go on top of the drawers.


Shot with the drawers below.  Love this little nook.  I'm all about creating stations and nooks in this kitchen.  Hoping by creating these we'll be more organized.  I'll keep you updated on how that works out.  Last night Jim and I started talking about where things will go.  We want to really think it through and get it right the first time.  I'm sure we'll be tweaking things as we go to better suit our needs.  But we want to be more deliberate where things will go as opposed to just throwing things in a cabinet just to get it done and unpacked like we did when we first moved.  Having the new kitchen is a great chance to start new again.


Drawers with their fancy new pulls.


Mike had to cut the front of the cabinet bigger to make room for the convection oven. 


Updated shot of the peninsula.


Better shot of the range area with its fancy new hood.  That range better not get a 'tude now that it's all fancy.


And the pantry with it's new pulls!


Close up.  All antiquey brass....Love the look of the brass against the dark gray of the cabinets.


And our "narrowed" down colors for the kitchen.  Houston I think we may have a problem.  What's your favorite color?  Weigh in with your vote!  Maybe yours will be the lucky one selected!

Lights are being installed today!  Dah!!!  Can't wait to get home to see how they look.

Tuesday, March 19, 2013

Day 17 #kitchenrenovation

Whelp, the kitchen renovation is nearing the end.  #liltear.  Kinda crazy to think it's almost done after the months and months and months of talking and planning and doing.  Not gunna lie....I'm going to miss it.  It was fun and kept us busy and off the streets during a time that I needed to have my mind busy. 

Today was mainly trim work day.  Mike only needs one more day to finish up what he needs to do, then Wednesday, the electrician is coming to hang the lights (!!!!!!!!), Friday the granite gets installed, Monday the plumber is coming back to hook up the appliances and the following Monday the flooring will get stained.  Hopefully we'll get the tile guy in there at some point too to put up the back splash.  Mike will have to come back to do a few finishing things but nothing major.  And then Jim and I will be painting our lil hearts out.

Below is the new pantry door.  We were able to reuse the existing pocket door track and hardware so that was great.  Toying with the idea of painting it yellow.  We'll see.


The baseboards and trim got installed too.  Love all the finish work!  Mike did a great job matching the existing trim work.


The back of the peninsula is finished!!!!  Can you tell we love bead board since we have it everywhere in the house??!


The crown moulding right up against the chimney.  No clue what that black spot is but it's not there in real life.  PHEW!  I loved the old crown that was in the original kitchen...chunky but simple.  Mike bought the crown moulding for us and installed it.  Again, having Mike purchase the crown vs. buying it from Schrock saved us a boat load of money.


We had crown moulding installed all around the kitchen.  We'll have to do the hallway ourselves but Jim's getting to be a pro at installing crown moulding.  Just call him Mr. Boombastic Crown Moulder.  What is up with that black dot??? Clearly I didn't notice it was there till I uploaded the pictures.

 This is looking from inside the pantry. The door trim was only put on two sides since it abuts the wall.


Base board moulding installed in the pantry.


And base boards installed in the closet.  I was nervous Mike would forget to install in the closet but he didn't!   Phew!

That's about it for today.  Catch up with y'all tomorrow!

Monday, March 18, 2013

Day 16 #kitchenrenovation

No posts this past weekend...all work and no time to sit and chat with you guys :(  But it was a productive weekend filled with things that we needed to get done before other things get installed/occurred. It kinda felt like we were on an episode of Kitchen Crashers with Mike leaving us a list of things that needed to get accomplished before he came back on Monday morning.  Two thumbs for us because we did indeed get everything accomplished with the help of some amazing friends.

Now onto the good stuff.

Below is the peninsula.  The last cabinet on the end was installed.  The peninsula is about a seven foot run...just enough to fit three bar stools, with an extra on the end when needed. 


The knobs for the tappen yaki grill, which be on the peninsula.  That can't get fully installed until the granite goes in as it sits on top of the granite.


The back of the peninsula.  It will be clad with bead board.  We saved about $700 by having Mike purchase the bead board vs. buying it from the cabinet maker.  It seriously is insane how much cabinet makers charge for pieces that you can buy yourself for SOOOO much cheaper (like corbels, bead board and moulding).  But you're probably thinking OK Erin yes it is cheaper but that bead board is white and sooo does not match the color of your cabinets....peeps, we've got it covered.  It's this little thing called color matching.  GENIUS I tell you.  Jim had read where Schrock uses Sherwin Williams paints on their cabinets so natch that was the first place we went with pieces of the cabinet in hand.  Sherwin Williams did a great job matching the kitchen cabinets right on but got a big fat fail on matching the pantry color.  Slightly discouraged, we went to Ace Hardware where we always go to buy all our paint because they sell Benjamin Moore and they are so helpful there.  And they give out free popcorn on Saturdays which Sammy loves (but he calls it PUPcorn...get it???)  The paint coordinator there was slightly cocky about being able to match the color exactly but I have to say he NAILED it...spot on. HIGHLY recommend going to Curry Ace for any painting needs.

Ok that was off on a tangent...reel it back in Erin.   Close up shot of the bead board on top of a furniture base moulding.  So crisp and clean!


Knobs were installed on Friday. I love how the ORB pops against the light gray cabinets.


The hutch in progress.  The two stacks of apothecary drawers (only one row pictured) can't be installed until the granite is installed. 


In the pantry, Mike put the cabinet doors up.  These won't be staying but I just love the color.


And we're reusing the old radiator cover that was in the pantry.  We'll just paint the white frame with the cabinet color so it will blend in and look like it came from the cabinet maker.

And here's Ellie testing out the new range (don't worry it wasn't hooked up so no children were hurt in the posing of this picture).  Isn't she just too cute for words???   


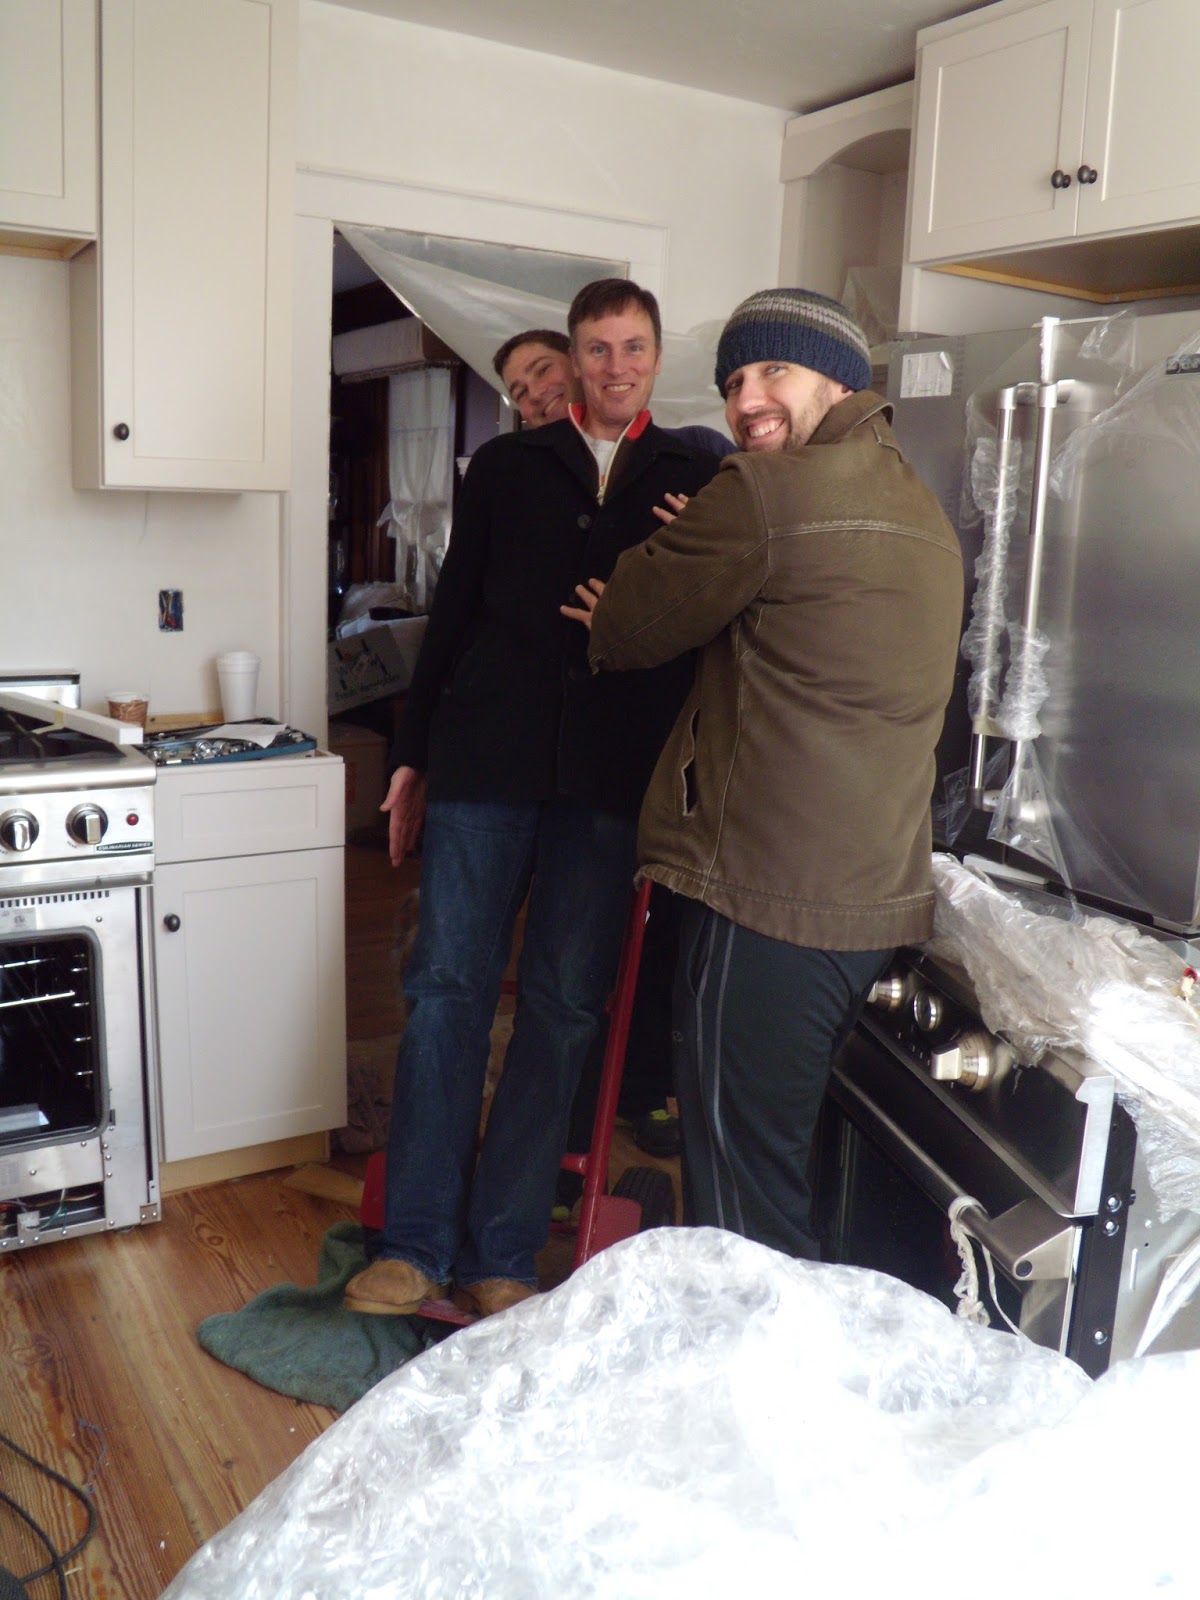
And a shot of the "boyz".  Thanks to JJ and Geoff we were able to get the appliances moved from the garage to the kitchen.  I didn't even ask them to pose like this.  This was all them. 


Another thing on our homework list was painting the ceiling.  Not a fun job but in the end I love how it came out.  So crisp and clean!  And yes we just went with boring white.


We also painted the chimney.  Man that thing sucks up paint like there's no tomorrow. I have to go some more after work to finish it up hopefully tonight.  We went with Benjamin Moore's Simply White in a semi gloss.  It's already looking better with a coat of paint.


And the new refrigerator.  Another minor crisis was discovered during the move of the appliances.  We ordered a top grill for the refrigerator.  Basically it is a 3" grill for the fridge to make it look like a more expensive built in.  Basically the look for less.  But sadly the wrong thing was ordered.  Hopefully we get it this week.  I will post an updated picture when it's installed.  And yes those are our NARROWED down paint colors to the right of the fridge.  Too many choices not enough time to decide!


Granite is getting templated today and installed Friday.  It's getting there!


Friday, March 15, 2013

Day 15 #kitchenrenovation

Back with another cabinet update...big changes are taking place in this neck of the woods and we couldn't be more thrilled with the progress. 

Below is the pantry...like I mentioned in the previous post the pantry cabinets are going to be slightly delayed due incorrect cabinet doors delivered...Doesn't that salmon color on the walls just really work well with the cabinet color?  (insert sarcastic tone here).  It's amazing how much bigger the pantry looks since we moved the washer/dryer down to the basement.  AND we can actually fit a cereal box in the cabinets...who knew such cabinets existed?? 


Still waiting to find just the right beverage center.  What we are going to put in the pantry is still up in the air but we are tossing ideas around.  We'll be sure to keep you updated on what our final plan is for this space and what will live in this area.


Onto the kitchen.  Doors and drawers were put on and our built in "hutch" is in the works (to the left of the refrigerator box).   


Better shot of the hutch.  This will house the TV and cable box (which is what those two plugs are for). Below the open cabinet will be three pot drawers with two stacks of apothecary drawers on top.  This will be our coffee station where we'll have our coffee pot, coffee grinder and other coffee paraphernalia. 


Our farmhouse sink is in!!!  Woo to the hoo! Mike had to tweak the sink base cabinet as Schrock doesn't make a cabinet to specifically fit a farmhouse sink.  On the toe kick of the cabinet is our toe kick radiator.  Since we removed the mammoth radiator that was on the Lady Land wall and replaced it with a row of cabinets instead, we had to have a heat source some where in the kitchen.  Our house is slowly inching towards the 21st century with the addition of a toe kick radiator.  So much more compact and HIDDEN!  Love this feature.  Mike thinks it will be enough to heat the space and only time will tell if this proves true.  But with the addition of insulation on the outer wall, I'm hoping that's all we need.  The bottom of the cabinet has a hole in it due to needing access to the radiator.  Darn building codes!  Don't they know they're messing with the prettiness of the cabinets??


The start of the peninsula.  One more cabinet will be added basically where the headless Jim (creepy!) is standing.  The cabinet with the door will be the future home of the tappen yaki grill where Chef Jim will be flipping shrimp into the mouths of visitors from the hours of 5-10...no reservations are needed.


Moving on down to the laundry nook.  People we have a washer/dryer....THANK THE LORD!  A girl can only live without a washer/dryer for so long.  It may take some time to make this nook look good but it will get there....some day.


 A beauty shot of the washer/dryer....hello front loaders...where ya been all my life?


Check back tomorrow for the hopeful conclusion of the cabinet installation.