Showing posts with label Appliances. Show all posts

Tuesday, April 23, 2013

Fridge Coasters #operationorganization


Does anyone find keeping your refrigerator clean such a battle and chore?  I sure do!  How do refrigerators get so dirty so quickly?  And when I start to think about how dirty my fridge is I get the shivers and close the door hoping the cleaning fairy will come clean it for me.  So far, she hasn't shown up. 

So with the arrival of the new beverage center I thought it would time to fun up our fridge and clean it out.  I know it's fairly new but for some reason it already had crumbs in it.  Annoying! 

Here's a few before shots of the fridge.  Looking pretty sparse huh?


Pickles and Sprite Zero anyone?


Condiments, juice and milk on one side.


Our fridge is on the smaller size so my quest is make good use out of each and every square inch of this fridge. 

But I'll get to that later.  Check out these fun fridge liners.  There's a party going on in my fridge!


Aren't they fun?


I purchased them from a company call Fridge Coasters.  They are made up of recycled materials and you should replace them periodically as they get stained.  They are made of a cardboard like material.  But the great thing about them is no stain to clean on the actual fridge because let's face it, cleaning the drawers and compartments of the fridge is less than my idea of a good time.  So anyway to make the process easier is a win in my book.  Plus I mean look at the fridge, doesn't it make you smile?  They come in various sizes to fit your type of fridge. 
Next up, organizing the fridge.

Friday, April 19, 2013

Let's talk...beverage centers

Well our last appliance to purchase has arrived and is in! 
 
We, well ok ok, Jimmmm, did a lot of research on it.  We went back and forth about purchasing a wine fridge vs. a beverage center.  A wine fridge can either be just for whites or it can be a dual zone wine fridge that holds whites and reds and houses them at their appropriate temperatures.  The more we debated the options the more we leaned towards a beverage center.  A beverage center basically has a couple wine racks as well as some shelves where you can store beer, water, soda, etc.  It just seemed more flexible and more importantly would free up valuable refrigerator space. 
 
So beverage center it was. 
 
Jim and I both would pop in independently and together at the Yale Appliance Outlet Center in search of a beverage center.  Unfortunately, we couldn't find the deal of the century there.  Jim, the crafty researcher he is, found a website where Perlick (the Arien of wine fridges/beverage centers) sells discounted/floor models.  Lo and behold, we found "the deal of the century" for a Perlick beverage center (you'll typically see Perlick at restaurants and bars as these are mainly commercial items).  Just a call to Perlick and we had the item within a few days.  Jackpot! 
 
It is a panel ready and it is technically an ADA compliant beverage center so it's a tad shorter than normal but it was nothing that a filler panel couldn't fix.  And since it's panel ready + wrong pantry door cabinets that we got to keep once the new ones were installed = Jim's gotta another project added to his honey do list!
 
Finally the beer has a home!  And it looks all neat and tidy!


The two wine racks...and apparently Vitamin Water racks too...told ya it's a multi tasker!


The full shot.  Ain't it something??   Just wait till it has its panel on it...


We love it and I love the space we have back in our fridge.  We are ready for a party at a moments notice!  The pantry is inching there, little project by little project.
 
  • Paint radiator cover same color as cabinets
  • Paint shelves and shelving trim same color as cabinets
  • Select a wall color
  • Paint the walls
  • Install pendant light
  • Install crown moulding
  • Paint the trim
  • Paint the pocket door
  • Install the beverage center
  • Get the new cabinet doors (as they sent us the wrong ones originally) and install the chicken wire
  • Organize and pretty up the cabinets and shelves
  • Make a window treatment
  • Fix window trim
  • Make and install panel for beverage center
  •  

    Wednesday, April 3, 2013

    Let's talk...teppan yaki grills

    This is what I like to refer to as Jim's dream.  Anyone who knows Jim, knows he loves him a good Japanese steakhouse.  When we first started daydreaming and planning our kitchen, Jim stated he would love a teppan yaki grill.  I thought the idea sounded awesome and who am I to squash a man's dreams like that?? 

    Once the kitchen planning and appliance research got underway, we realized just how expensive the grills were and the chances of us getting that fancy grill was put on the back burner (get it???  burner???  no?  ok...moving on.).  But the stars aligned, the skies parted and we found a Gaggenau teppan yaki grill on a floor model sale at Kam Appliances.  My man was meant to get that grill after all! 


    For Jim's birthday I surprised him with a fancy spatula to use just for the grill, just like the chefs use at a Japanese steak house. 


    And Jen, Jim's sister, got him some fun paper chef hats (for catching all those shrimp he's going to be tossing in the air) and commercial salt and pepper shakers. 


    You gotta have the legit accessories if you're going to talk the talk of a Japanese steak house chef.

    So far we've used it to make an authentic Japanese steakhouse meal and it was better than going to one.  I made it to cook eggs and that was good but the eggs stuck a little and the clean up was a pain.  I can't wait to try out some pancakes on it soon.  Supposedly you can even boil water on it....not sure if we'll be trying that out anytime soon though.  When it's not in use we are thinking of putting a cutting board over so we don't waste any counter space. 

    The floors are being stained this week so we have had zero access to the kitchen or basement so no work has been getting done.  Hopefully this weekend, Jim will be able to work on something kitchen and/or pantry related.  I'll be shopping for baht mitzvah dresses for my niece Sophie...the sacrifices I must make ;)


    Thursday, March 21, 2013

    Day 19 #kitchenrenovation

    Turn out the lights baaaaybaaaay (name that tune!)  Actually don't turn out the lights!  Turn them ON!  Man oh man am I in love!  Some of you have asked me if there has been a moment yet during this whole process if I was afraid that our vision wasn't turning out like we thought it would.  This was that moment...I was afraid the pendants were going to be too big for the space but thankfully I think they turned out to be the perfect size.  They did look ginormous in the box (even Jim thought so) but now that they are installed they look normal.  Guess I need to work on my spatial relations.

    Below are the teal farmhouse pendants that are hanging over the peninsula.  I think they add a nice pop of color in our neutral kitchen.  My thinking behind this whole kitchen was to keep the really expensive stuff and the main parts of the kitchen neutral in hopes that it will stay in style for many years to come but yet add in color in areas that are cheaper and easier to replace should we get sick of them. Cue the teal colored lights.


    And below is the pendant hanging over the sink.  Again another one where I thought it might be too big when it first arrived but now that it's up I love it and the size is just right.  Sorry for the hard to see pictures.  I didn't take these till really late last night.  And I know I need to work on my photography skills and maybe even learn how to use photo shop.


    Close up of the farmhouse pendants.  Aren't they fun?


    Looking towards the powder room.  This shot gives you a perspective for about how high up they hang.  It's a good distance from the counter to the bottom of the lights.  You can still stand up and not have these hit you in the face.


    A somewhat better shot on the sink pendant.  You may have noticed the light bulb if you're keen observer.  If you did, you get a gold star for the day!  We purchased what they call vintage light bulbs.  They are a unique shape and clear so you can see the filament.  I think they give the pendants that extra oomph!  You can find them in the light bulb aisle of any home depot or hardware store.  They do cost extra just to warn you (Jim may or may not have a small heart attack when he saw the price.  So if you go with your significant other to buy these, make them wear a blindfold, supply them food so they are distracted or have them go to another department.  You'll thank me later.)


    Beauty shot!


    The electricians also installed the convection oven.  Yes the door is missing, your eyes aren't fooling you.  Mike has to come back to put the door back on.


    Now the refrigerator has its friend the convection oven to talk to.  They're so cute together aren't they?  Our refrigerator is up and running now as well.  (water dispenser and ice maker to be hooked up on Monday when the plumber comes back out).  And the vent hood for the range was also hooked up. And no we haven't picked a color yet.  We need to get on that.  Bad Hornes!


    Our new pantry light.  Isn't she priceless???  Don't you just love her???  Just kidding!  That's not our real pantry light...it's just a temporary holder until the real light fixture comes in.  It's been back ordered for FOUR months.  Yes I typed that right and you read that right.  Count 'em FOUR months!  Ridic!  Back ordering has been the name of the game since the kitchen renovation started.  Guess the economy can't be that bad right?


    And the laundry nook chandie...isn't it sooooo gorg????!?!  I love the shadows it cast on the walls.  Just makes doing laundry that much more fun.


    Side shot for you because I can't get enough.


    Tomorrow the granite is getting installed.  I think that is going to be a complete game changer and really take the kitchen to another level.  Can't wait!
    

    Monday, March 18, 2013

    Day 16 #kitchenrenovation

    No posts this past weekend...all work and no time to sit and chat with you guys :(  But it was a productive weekend filled with things that we needed to get done before other things get installed/occurred. It kinda felt like we were on an episode of Kitchen Crashers with Mike leaving us a list of things that needed to get accomplished before he came back on Monday morning.  Two thumbs for us because we did indeed get everything accomplished with the help of some amazing friends.

    Now onto the good stuff.

    Below is the peninsula.  The last cabinet on the end was installed.  The peninsula is about a seven foot run...just enough to fit three bar stools, with an extra on the end when needed. 


    The knobs for the tappen yaki grill, which be on the peninsula.  That can't get fully installed until the granite goes in as it sits on top of the granite.


    The back of the peninsula.  It will be clad with bead board.  We saved about $700 by having Mike purchase the bead board vs. buying it from the cabinet maker.  It seriously is insane how much cabinet makers charge for pieces that you can buy yourself for SOOOO much cheaper (like corbels, bead board and moulding).  But you're probably thinking OK Erin yes it is cheaper but that bead board is white and sooo does not match the color of your cabinets....peeps, we've got it covered.  It's this little thing called color matching.  GENIUS I tell you.  Jim had read where Schrock uses Sherwin Williams paints on their cabinets so natch that was the first place we went with pieces of the cabinet in hand.  Sherwin Williams did a great job matching the kitchen cabinets right on but got a big fat fail on matching the pantry color.  Slightly discouraged, we went to Ace Hardware where we always go to buy all our paint because they sell Benjamin Moore and they are so helpful there.  And they give out free popcorn on Saturdays which Sammy loves (but he calls it PUPcorn...get it???)  The paint coordinator there was slightly cocky about being able to match the color exactly but I have to say he NAILED it...spot on. HIGHLY recommend going to Curry Ace for any painting needs.

    Ok that was off on a tangent...reel it back in Erin.   Close up shot of the bead board on top of a furniture base moulding.  So crisp and clean!


    Knobs were installed on Friday. I love how the ORB pops against the light gray cabinets.


    The hutch in progress.  The two stacks of apothecary drawers (only one row pictured) can't be installed until the granite is installed. 


    In the pantry, Mike put the cabinet doors up.  These won't be staying but I just love the color.


    And we're reusing the old radiator cover that was in the pantry.  We'll just paint the white frame with the cabinet color so it will blend in and look like it came from the cabinet maker.

    And here's Ellie testing out the new range (don't worry it wasn't hooked up so no children were hurt in the posing of this picture).  Isn't she just too cute for words???   


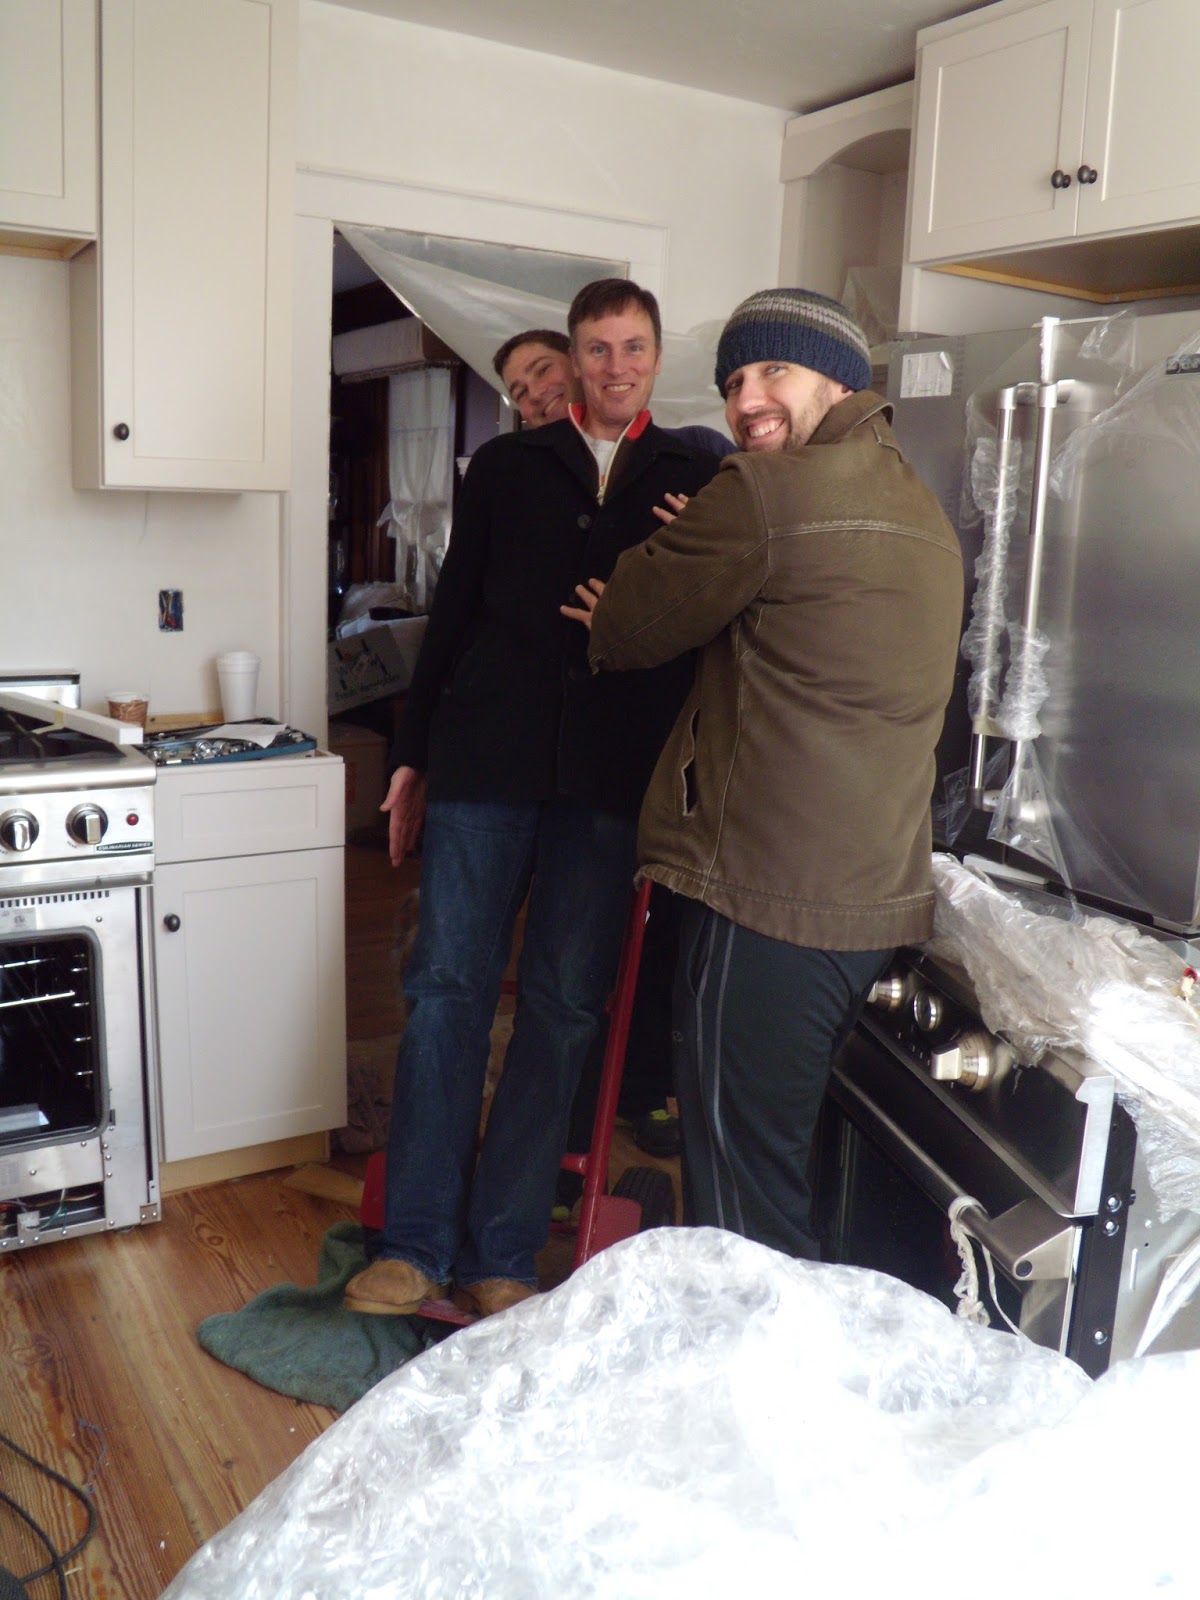
    And a shot of the "boyz".  Thanks to JJ and Geoff we were able to get the appliances moved from the garage to the kitchen.  I didn't even ask them to pose like this.  This was all them. 


    Another thing on our homework list was painting the ceiling.  Not a fun job but in the end I love how it came out.  So crisp and clean!  And yes we just went with boring white.


    We also painted the chimney.  Man that thing sucks up paint like there's no tomorrow. I have to go some more after work to finish it up hopefully tonight.  We went with Benjamin Moore's Simply White in a semi gloss.  It's already looking better with a coat of paint.


    And the new refrigerator.  Another minor crisis was discovered during the move of the appliances.  We ordered a top grill for the refrigerator.  Basically it is a 3" grill for the fridge to make it look like a more expensive built in.  Basically the look for less.  But sadly the wrong thing was ordered.  Hopefully we get it this week.  I will post an updated picture when it's installed.  And yes those are our NARROWED down paint colors to the right of the fridge.  Too many choices not enough time to decide!


    Granite is getting templated today and installed Friday.  It's getting there!
    

    Wednesday, March 13, 2013

    Let's talk...ranges

    So you know we already have the convection oven, aka "baking central", now what about the big guns?  The work horse of the kitchen?  The appliance that Jim will be making most of our meals with?  After much research done by none other than research extraordinaire Jim, we settled on the Capital.  It's a company that was started by a guy who originally started Viking (one of the first companies to make commercial grade ranges but has since gone down in ratings in terms of reliability) but left Viking to start DCS then from there went to start Capital.  The Capital gets high reviews and marks from top chefs and consumers alike so it was a natural choice for us.  The price also didn't hurt either...for a commercial grade six burner range it was on the lower end of the price scale.

    We really lucked out and got this sucker on a floor model sale.  It's a six burner gas range.  All burners are 23,000 BTU's...that's a whole lotta gas going on (and not THAT kind of gas!)  and the oven has 30,000 BTUs too.  We're talking steak house quality steaks....ahhhh can't wait for Jim to make me some filet mignons in the new range.  Jim originally wanted a the 36" range but with the grill feature.  We ended up axing that idea as through research we learned it's not actually gas that is used to fire up the grill but rather infrared electric burner that is used to cook food.  So you wouldn't necessarily get that charred taste that you would from a grill.  Another reason against the grill was it creates a lot of grease and mess and we didn't love that part of it.  So we went with the standard 6 burner gas range.

    Only negative that I can see is it is not self clean.  Which honestly I'm fine with because in all the years we've had self cleaning ovens I've never used that feature and just cleaned it myself. 

    Cabinets were delivered today and hopefully the installation started. Hopefully I'll have pictures to share tomorrow.

    Monday, March 4, 2013

    Let's talk...refrigerators!

    Ahhh fridges...big ones, smalls ones, side by side, french door, etc., etc., etc...When we first started this process, all I knew was that I wanted BIG (The bigger the better in my book) and a side by side.  I knew I did NOT want the freezer on the bottom because I never thought you could find anything in the freezer since it's basically a chest freezer. But my dream lasted ooooh 5 minutes when it was quickly shattered by Mr. Practical (aka my husband).  Why do men always have to be so practical???  Can't they let our dreams live a lil longer than 5 minutes???  Anyhoo, I'm getting off topic here.  Refrigerators.  We spent months (ok, I kinda made us spend months) researching and shopping since it had to fit a couple key criteria:  professional handles, counter depth, had to look built in, couldn't be wider than 36" since we wanted to keep as much counter space as possible, side by side, and oh yeah, couldn't cost thousands and thousands of dollars.   During the search I realized that if I couldn't get a big fridge, then having a side by side didn't make sense because the one we have now is a side by side and I think the freezer is super skinny and I basically can't even fit a plate in there let alone a big ice cream cake.  So I accepted the fact my dream was gone and we started looking at french door frigs.  Then I started being picky about the drawers...no wire drawers, had to pull out, etc.  I was basically becoming unrealistically picky and I do think Jim may have wanted to strangle me...God bless his soul.

    Enter the Jenn Air.  It had professional handles that you could purchase as well as grill that would make the refrigerator appear built in like it's more expensive counterparts such as the Subzero. 


    Interesting fact.  This refrigerator is made by Amana (the appliance division is owned by Whirlpool) and this same exact fridge is also sold by Kitchen Aid and Viking with each having a different price point.  I'm sure you can guess which one was more expensive...so a lot of times you really are just paying for the brand name.  Jenn Air was offering really good rebates which was a huge factor in our decision but I also liked the fact that I could upgrade to the professional handles for a nominal fee.  So I was getting the look for less!  Awesomesauce!

    Sunday, February 24, 2013

    Let's talk....ovens.

    Baking central is.about.to.go.down....

    I've always loved houses with double wall ovens.  Originally we were thinking that was what we wanted in the oooooh three + years we've been talkin' and dreamin' about a new kitchen.  Perhaps we're losing our self proclaimed moniker of "Hasty Hornes" since it's taken us that long to get going on updating the kitchen?  No?  Not yet?  OK.

    During our months and months of appliance research (going to multiple appliance stores and Jim researching on the world wide web and buying a years subscription to Consumer Reports) we decided that the direction we wanted to go with was to get one gas oven and one electric convection oven. Another reason we decided to go with the single vs. double ovens is we didn't want to lose the counter space since we don't have a lot to begin with.  Save the counter tops!!

    Confession time, I heart Sarah Richardson BIG time.  On the season where she renovated a farm house she went to Sears and bought the Kenmore Pro line.  So we decided to check out Sears and that's where we were saw the Kenmore Pro single wall oven.  It had to have the professional handle that I had became obsessed with.

    Did you know Sears has an online outlet where you can purchase floor models or scratch and dents?  No?  Well neither did I till Jim found it.  Low and behold they had the single Kenmore Pro wall oven for over half off the store price!  I quickly bought it and two weeks later our oven was delivered.  I love the dial temperature, the professional handle, the fact that it's a convection oven...basically I love everything about it.


    Now that we have a convection oven (a baker's dream oven since you can have a cookie sheet on every rack and each sheet will cook the cookies perfectly since the heat is constantly being circulated through out the oven) I want to create a baking center where all cookie sheets and cake pans and sugar and flour...basically anything and everything baking, will be housed.  I'm thinking in the corner right next to the oven.  Organization is the name of the game come  time to set things up in the kitchen...let's see if it actually happens!